Android 6.0 Multipart HTTP POST

This how-to shows you how to use a multipart HTTP POST request to upload a file and metadata to a web server. Android 6.0 removed support for legacy HTTP libraries, so a lot of examples I found online are outdated (or require adding the legacy libraries). This solution uses the excellent OkHttp library from Square – because instead of adding legacy libraries for the old method, you should add a new library that’ll also save you a lot of work!

Step 1: Add OkHttp to your gradle build script

In Android Studio, open the build.gradle script for your main project module and add OkHttp to your dependencies:

dependencies {
    compile 'com.squareup.okhttp3:okhttp:3.5.0'
}

Step 2: Create and execute an HTTP request

This example shows how to upload the contents of a File object to a server, with a username and date string as metadata.

String UPLOAD_URL = "http://yoururl.com/example.php";

// Example data
String username = "test_user_123";
String datetime = "2016-12-09 10:00:00";
File image = getImage();

// Create an HTTP client to execute the request
OkHttpClient client = new OkHttpClient();

// Create a multipart request body. Add metadata and files as 'data parts'.
RequestBody requestBody = new MultipartBody.Builder()
        .setType(MultipartBody.FORM)
        .addFormDataPart("username", username)
        .addFormDataPart("datetime", datetime)
        .addFormDataPart("image", image.getName(),
                RequestBody.create(MediaType.parse("image/jpeg"), image))
        .build();

// Create a POST request to send the data to UPLOAD_URL
Request request = new Request.Builder()
        .url(UPLOAD_URL)
        .post(requestBody)
        .build();

// Execute the request and get the response from the server
Response response = null;

try {
    response = client.newCall(request).execute();
} catch (IOException e) {
    e.printStackTrace();
}

// Check the response to see if the upload succeeded
if (response == null || !response.isSuccessful()) {
    Log.w("Example", "Unable to upload to server.");
} else {
    Log.v("Example", "Upload was successful.");
}

Summary

OkHttp is awesome because it removes a lot of the heavy lifting necessary to work with HTTP requests in Android. Construct your request content using Java objects and it’ll do the rest for you. If you’re looking for a replacement for the HTTP libraries deprecated in Android 6.0, I strongly recommend this one.
Synthesising Speech in Python

There’s a Scottish company called CereProc who do some of the best speech synthesis in the world. They excel in regional accents, especially difficult Scottish ones! I’ve been using their CereVoice Cloud SDK in some recent projects (like Speek). In this post I’m going to share a wee Python script and an Android class for using their cloud API to generate synthesised speech. To use these, you’ll need to create a (free) account over on CereProc’s developer site and then add your auth credentials to the code.

Downloading Speech in Python

Call the download() function with the message you wish to synthesise, optionally specifying which voice to use, which file format to use and what to name the file.

Downloading and Playing Speech in Android

Create a CereCloudPlayer object and use its play method to request, download, and play the message you wish to synthesise.

Speek Notifications

Speek Notifications is an Android application I made for fun which tells you about your notifications when you hold your hand over the proximity sensor. I use the CereCloud Voice service to synthesise speech in one of two voices. To prevent Speek running while your phone is in your pocket I also use the gravity sensor to check if the device is on a flat surface. Visit the project on github to download the source code.

Demo Video

Screenshot

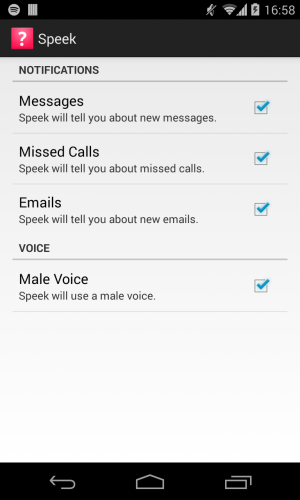
A screenshot of Speek - an Android app which reads information about your notifications when you cover the proximity sensor.

Network status in Android KitKat

nexus five phone

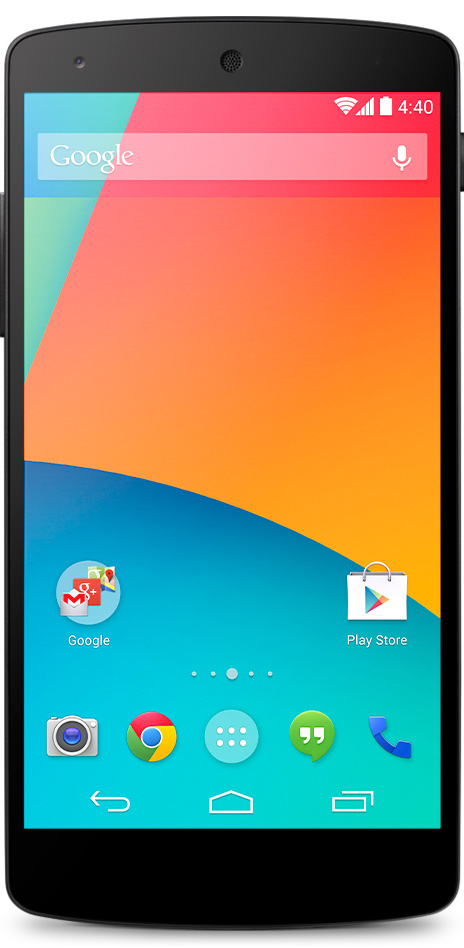
Android KitKat, the most recent version of the Android operating system, has had a bit of a facelift. Gone are the solid black backgrounds and blue accents which defined Android’s aesthetic, replaced by a much cleaner look. On the home screen (pictured), transparency and white icons create a simpler appearance.

While this improves the appearance of Android (in my opinion) it also takes away a subtle visual cue which I found really helpful. In the old Android colour scheme, the network connection icon changed from blue to grey when the internet connection was down. With a rather unreliable router at home, this subtle cue let me know the difference between having to reboot the router and just having to wait a while longer for things to load; because when you live in a rural area, the internet is just terrible.

It’s a minor quibble, I know, but I’ll miss that helpful little indication of network status. It’s a shame when function is sacrificed for form, no matter how insignificant it may seem.

TLX for Android

Overview

NASA-TLX (Task Load Index) is a way of measuring subjective workload. It is often used in HCI research as a way of finding out the workload associated with interaction techniques, interface designs, etc. TLX is often administered as a paper-based questionnaire or completed online. To make it easier to administer the questionnaire during evaluations involving mobile phones, this project provides an Android version of the NASA-TLX tool.

This project adapts Keith Vertanen’s online implementation of TLX. Mark McGill helped greatly with the initial Android implementation of this project. Note that our version only provides “raw TLX”; there are no pairwise comparisons used to weight the subscales.

Source code

Available on Bitbucket.

Git repository: https://bitbucket.org/efreeman/android-tlx.git

Usage

Question responses are in the range of 5 to 100, with intermediate values in intervals of 5. A directory titled “TLX” is created in the root of the external storage of the phone. A separate subdirectory is created for each participant (e.g. the third participant’s responses are stored in “P3”). Responses are put into a CSV file.

The project is tailored towards one of my current projects so is designed to store a separate response file for each block in our study. Adapting this to meet your needs should be pretty simple.

MyLists

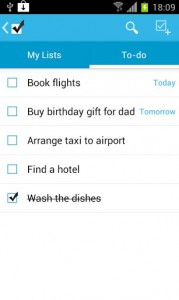
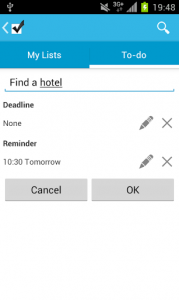
A simple list maker which I created as a toy project while learning the Android SDK changes in Ice Cream Sandwich. Decided to polish the app and release it. Still something I come back to every now and again for fun.

Google Play Store

ml1 ml2

Method Profiling in Android

I’ve recently been using the Android implementation of OpenCV for real-time computer vision on mobile devices. Computer vision is computationally expensive – especially when you’re working with a camera stream in real-time. In trying to speed up my object tracking algorithm I used Android’s method profiler to analyse the time spent in each function, hoping to identify potential areas for optimisation. This makes an interesting little case study and example of how to use Android’s profiling tools.

How do I enable profiling?
Traceview is part of the Eclipse ADT. Whilst in the DDMS perspective, method profiling can be enabled by selecting a debuggable process and clicking the button circled below. To stop profiling, click the button again. After the profiler is stopped, a Traceview window will appear.


Interpreting Traceview output


The image above was my first method trace, capturing around seven seconds of execution and thousands of method invocations. Each row in the trace corresponds to a method (ordered by CPU usage by default). Selecting a row expands that method, showing all methods invoked from within that method. Again, these are ordered by their CPU usage.

Optimisation using profile data
Using the above example, we can see that my object tracking algorithm spends most of its time waiting for four methods to return: Imgproc.pyrDown, MainActivity.blobUpdate, Imgproc.cvtColor and VideoCapture.retrieve. The pyrDown method downsamples an image matrix whilst applying a Gaussian blur filter. The blobUpdate method is a callback I use to give updates on a tracked object. The cvtColor method converts the values in a matrix to those of another colour space. The retrieve method captures a frame from the device camera.

The latter two methods are crucial to my object tracking algorithm, as I need to call retrieve to get images from the camera and cvtColor is used to convert from RGB to HSV colour space, as it is better to perform colour thresholding this way. The former two, however, can potentially be optimised.

From this trace I’ve already identified a redundant yet expensive method call: pyrDown. 30% of the time spent in the processFrame method is spent waiting for pyrDown to return. I was using this function to downsample an image from the camera to 240×320, as a smaller image can be processed faster. Instead, this call can be eliminated by requesting 240×320 images from the camera.

In the blobUpdate method I send updates about the location of the tracked object and its size. I maintain a short history of these readings and use dynamic time warping to detect gesture input. By expanding the trace for this method I see that my gesture classification function is taking the most time to execute. As dynamic time warping, by design, finds alignments between sequences of different lengths, I can reduce the frequency of checking for gestures. By only checking for gestures in every second call of blobUpdate, I effectively half the amount of time spent checking for gestures. This still maintains a high recognition rate by virtue of dynamic time warping’s resilience to differences in alignment length.

Conclusion
The case study in this post demonstrates how method profiling can be used to identify potential areas for optimisation; something which can be particularly beneficial in a computationally expensive application. By profiling a few seconds of execution of a computer vision algorithm I was able to capture data about thousands of method invocations. From the trace data I identified a redundant method call which accounted for 30% of my algorithm’s execution time and identified an optimisation to the second most expensive method call.

Multimodal Android Development Part 1

This post is the first of two which gives a brief introduction to creating multimodal interactions in Android applications. I’ll briefly cover some of the SDK features available to you as an Android developer which you can use to create richer interactions in your apps. Example code will be quite concise because I assume you have at least a basic knowledge of Android development. Feel free to leave any comments suggesting how I can better explain these concepts, or to let me know if I’ve made any mistakes or omissions.

What is “multimodal” interaction?

Multimodal interaction, put simply, is interaction involving more than one modality (e.g. multiple senses). For example, an application may provide a combination of visual and haptic (touch) feedback. These types of interaction design provide a number of benefits, for example allowing those with sensory impairment to interact using other senses, or allowing interaction in contexts where one sense may be otherwise occupied.

One of the most ubiquitous examples of a multimodal interaction is the way in which mobile phones combine visual, audible and haptic feedback to inform users of a new text, phone call, etc. This combination of modalities is particularly useful when your phone is, say, in your pocket. Obviously you can’t see the phone, but you will probably feel the phone vibrate or hear your ringtone as new notifications appear.

Haptic feedback in Android

Most handheld Android devices have some sort of rotation motor in them allowing simple haptic feedback. Although not common in tablets (largely due to size constraints), all modern Android phones will have tactile feedback available. You can control the phone vibrator through the Vibrator class. Note that in order to use this, your Manifest must request the following permission: android.permission.VIBRATE

/* Request the device's vibrator service. Remember to check
 * for null return value, in case this isn't available. */
Vibrator vibrator = (Vibrator) getSystemService(Context.VIBRATOR_SERVICE);

/* Two ways to control the vibrator:
 *  1. Turn on for a specific time
 *  2. Provide a vibration pattern */

/* 1. Vibrate for 200ms */
vibrator.vibrate(200);

/* 2. Vibrate for 200ms, pause for 100ms, vibrate for 300ms. */
long[] pattern = new long[] {0, 200, 100, 300};

/* Perform this pattern once only (repeat := -1). */
vibrator.vibrate(pattern, -1);

/* Vibrate for 200ms, followed by indefinite repeat of
 * 100ms pause followed by 300ms vibrate. Setting
 * repeat := 2 tells the vibrator to repeat at offset
 * 2 into the vibration pattern. */
vibrator.vibrate(pattern, 2);


Touchscreen gestures

Using touchscreen gestures to interact with applications can be fun, efficient and useful when users may be unable to select a particular action on the screen. For example, it can be difficult to select a button on-screen when running or walking. A touch gesture, however, is a lot easier and requires less precision from the user. The disadvantage with touch gestures is that if not used sparingly, there may be too much for the user to remember!
Creating a set of gestures for your application is simple: create a gesture library on an Android Virtual Device using the Gesture Builder application (available on the AVD by default) and add a GestureOverlayView to your activity layout. In your activity, you just have to load the gesture library from your resources and implement an OnGesturePerformedListener.


private GestureLibrary mLibrary;

public void onCreate(Bundle savedInstanceState) {
  ...
  /* 1. Load gesture library from the res/raw/gestures file */
  mLibrary = GestureLibraries.fromRawResource(this, R.raw.gestures);

  if (!mLibrary.load())
    /* Error: unable to load from resources! */
    ...

  /* 2. Find reference to the gesture overlay view */
  GestureOverlayView gov = (GestureOverlayView) findViewById(R.id.gestureOverlay);

  /* 3. Register callback for gesture input */
  gov.addOnGesturePerformedListener(this);
}

The callback method for gesture performance receives a Gesture as an argument. This can be used to obtain a list of predictions: which gestures in your library that Android thought the gesture was. With these predictions, you can use the prediction score (or contextual information) to determine which gesture the user was most likely to have performed. I find it useful to define a threshold for gesture acceptance, so that you can reject erroneous or inaccurate gestures. The best way to choose this threshold value is through trial and error: see what works for you and your gestures.

private static final double ACCEPTANCE_THRESHOLD = 10.0;

public void onGesturePerformed(GestureOverlayView overlay, Gesture gesture) {
  /* 1. Get list of gesture predictions */
  ArrayList predictions = mLibrary.recognize(gesture);

  if (predictions.size() > 0) {
    /* 2. Find highest scoring prediction */
    Prediction bestPrediction = predictions.get(0);

    for (int i = 1; i < predictions.size(); i++) {
      Prediction p = predictions.get(i);
      if (p.score > bestPrediction.score)
        bestPrediction = p;
    }

    /* 3. Decide if we'll accept this gesture */
    if (bestPrediction.score > ACCEPTANCE_THRESHOLD)
      gestureAccepted(bestPrediction.name);
  }
}

private void gestureAccepted(String gestureName) {
  /* Respond appropriately to the gesture name */
  ...
}


Saving map images in Android

Recently I’ve been working on a little Android project and wanted to save thumbnail images of a map within the application. This post is just sharing how to do exactly that. Nothing too complicated. 

public class MyMapActivity extends MapActivity {
    private MapView mapView;

    ...

    private Bitmap getMapImage() {
        /* Position map for output */
        MapController mc = mapView.getController();
        mc.setCenter(SOME_POINT);
        mc.setZoom(16);

        /* Capture drawing cache as bitmap */
        mapView.setDrawingCacheEnabled(true);
        Bitmap bmp = Bitmap.createBitmap(mapView.getDrawingCache());
        mapView.setDrawingCacheEnabled(false);

        return bmp;
    }

    private void saveMapImage() {
        String filename = "foo.png";
        File f = new File(getExternalFilesDir(null), filename);
        FileOutputStream out = new FileOutputStream(f);

        Bitmap bmp = getMapImage();

        bmp.compress(Bitmap.CompressFormat.PNG, 100, out);

        out.close();
    }
}

In the getMapImage method, we’re telling the map controller to move to a particular point (this may not matter to you, you may just want to take the image as it appears) and zooming in to show a sufficient level of detail. Then a Bitmap is created from the map view’s drawing cache. The saveMapImage method is just an example of how you may want to save an image to the application’s external file directory.